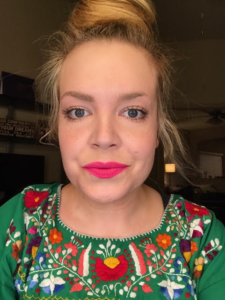
Beautiful Brows Made Easy!
As with every beauty trend, there are things that come and go. In my personal and professional opinion, brows are back in full force, and I hope that they are here to stay! A well-enhanced brow will literally frame your face and compliment your natural beauty. Brows can assist in making you appear more youthful and awake, and who doesn’t want that? I tell all my clients that no brow should be left untouched – even the thickest and most naturally beautiful brows need a little help. There are a ton of brow products on the market: pomades, gels, pencils – but which one is for you? If you’re a brow newbie or if the thought of adding another step into your makeup routine gives you a headache, have no fear! In just a few super simple steps, I will show you a user-friendly, quick and easy way to enhance your brows.
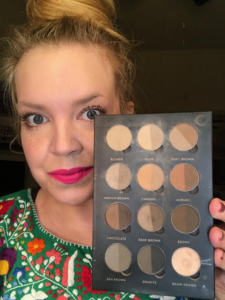
The simplest, most forgiving product for use on your brows is definitely a brow powder. You can purchase a powder made specifically for brows or fake it and experiment with a soft, natural eyeshadow color. For an effortlessly natural looking brow, the trick here is to make sure you’re choosing a shade that is somewhere between the hair on your head and your natural brow color. Anything outside of that range will be too dramatic and could result in severe, angry brows. The goal is not for people to notice that your brows are very “done” looking, just that you look great!
Here’s what you’ll need to create the perfect, easy brow
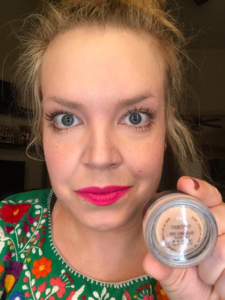
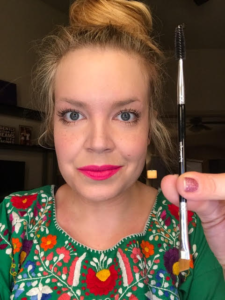
My brush of choice is the Brow Tamer from LimeLight by Alcone (www.limelightbyalcone.com/
-Optional: clear or tinted brow gel
Pro Tip: try using your ring finger (your weakest finger pressure-wise for the delicate eye area!) and gently pat on some of the Painterly Paint Pot.
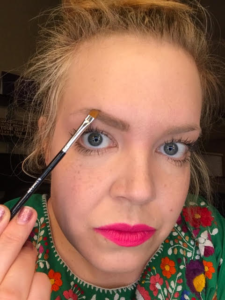 I usually begin at the base of my eyelashes and work upwards, patting product through the brow hair. Any shadow primer will work, but my favorite thing about the Paint Pots is that they will neutralize any unevenness in tone on your eyelids, adding to the overall fabulous look we’re going for. Veins or splotchy tones on those eyelids are gone and you’re left with a clean canvas for your brows to be the star! Some brow powders will come with a wax that you can use as primer but frankly they aren’t my favorite. To each their own — use what YOU like!
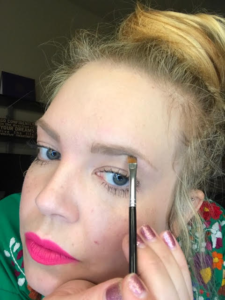
Pro Tip: It’s also incredibly important to take a step back from the mirror! Focusing closely on an isolated area of your face for too long will warp your perspective! Take a few steps back from the mirror. Assess what you’ve done. You can always add more brow powder!
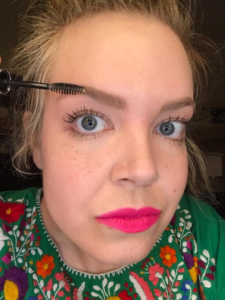
Pro Tip: if you feel like you’ve gotten too heavy handed, hold the spoolie (mascara wand end of the brow brush!) horizontally and move it left to right a few times. The back and forth motion will grab some of the brow powder and instantly soften any harsh lines or dark spots. You can also graze the area lightly with a cotton swab, but I swear by the spoolie as an ‘eraser’ tip!
Step 3 (Optional): An optional extra step is to top off your completed brows with a clear or tinted brow gel. I use the clear brow gel from Anastasia Beverly Hills and it simply helps keep any stray brow hairs in place and can further lock on the powder you’ve used.

 Kari Ann Shuler was born in Maryland and relocated to Texas in 1999 during her freshman year of high school. She’s called Fort Worth home since 2004, when she attended TCU and fell in love with makeup while taking a stage makeup course through the theatre department. Kari graduated in 2007 with a degree in Radio TV Film. She has applied her knowledge of lighting and the way things are perceived on camera as an integral part of her approach to makeup. She specializes in Bridal and makeup for special occasions but also offers makeup lessons and applications for all occasions. She has been featured in print and television including an episode of “My Fair Wedding with David Tutera.” She’s previously served as Lead Makeup artist at Fort Worth Blow Dry Bar and Primp Beauty Bar. She has a 16 year old cat named Bear and will marry her fiance David in December of this year.

 Sign in
